Bootstrap Header Template
Intro
Like inside of set documentations the header is one of the most necessary components of the webpages we get and make to employ regularly. It tightly maintains the absolute most critical information about the status of the company or people responsible for the page itself and the essence of the entire internet site-- its navigation building which in turn as well as the Bootstrap Header Design itself really should be thought and made in this kind of method that a site visitor in a rush or not really actually knowing in which way to head to merely take a look at and get the wanted info. This is the preferred circumstances-- in the real life obtaining as close as possible to this visual aspect and activity additionally goes on due to the fact that we almost each and every moment have some project specified restrictions to think about. Additionally compared with the written paperworks on the planet of net we should really always bear in mind the choice of possible gadgets on which our pages could possibly get presented-- we ought to assure their responsive attitude or in other words-- ensure that they will show ideal at any display size possible.
So let's take a look and see the way in which a navbar gets established in Bootstrap 4. ( more tips here)
Steps to make use of the Bootstrap Header Example:
Firstly for you to generate a web page header or else since it gets pertained to within the framework-- a navbar-- we have to wrap the entire thing in a
<nav>.navbar.navbar-toggleable- ~ screen size ~.bg-*.navbar-light.navbar-lightWithin this parent feature we should initiate by setting a button element which shall certainly be utilized to feature the collapsed material on a smaller sized display sizes-- to perform that develop a
<button>.navbar-toggler.navbar-toggler-left.navbar-toggler-righttype = " button "data-toggle ="collapse"data-target = " ~ the collapse element ID ~What is truly bright new for newest alpha 6 release of the Bootstrap 4 framework is that within the
.navbar-togler<span>.navbar-toggler-icon<a>.navbar-brand<div class="img"><img></div>Now-- the critical component-- building the collapsible container for the fundamental website navigating-- to perform it make an element utilizing the
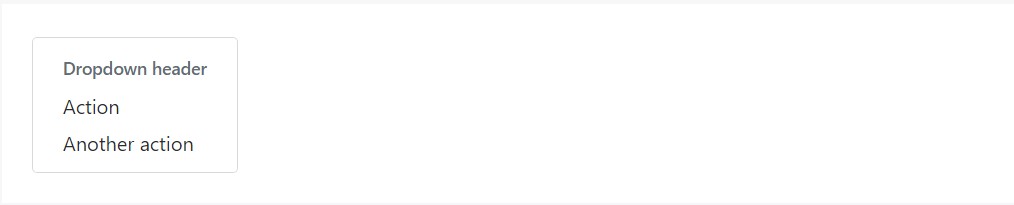
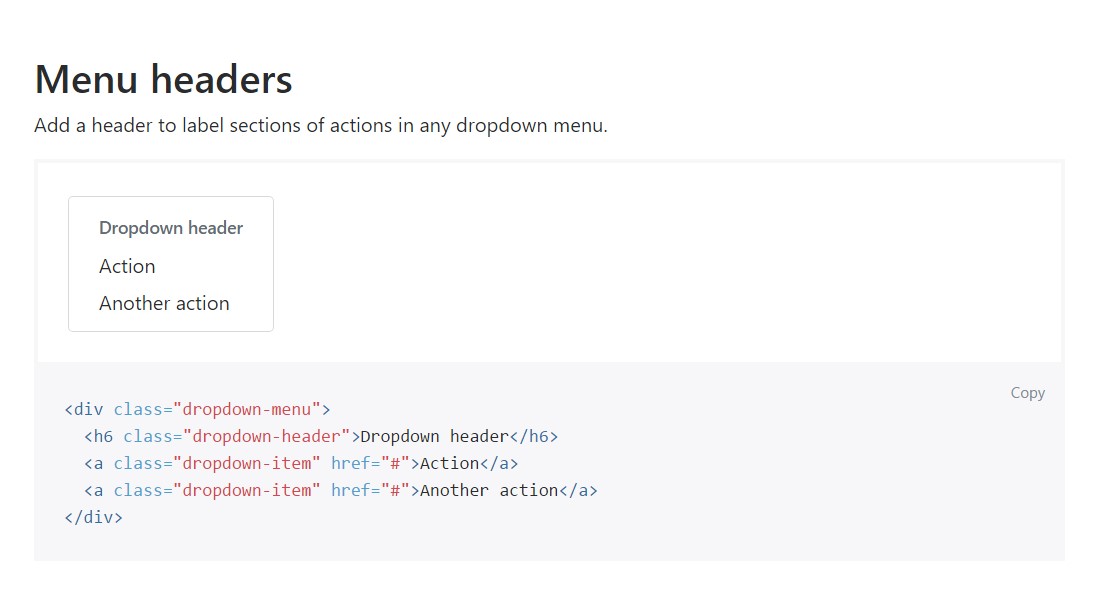
.collapse.navbar-collapseid =" ~ same as navbar toggler data-target ~ ".collapse<ul>.navbar-nav<ul><li>.nav-item<a>.nav-link.nav-item.nav-link.nav-item.dropdown<li>.dropdown-toggle.nav-link.nav-item<div>.dropdown-menu.dropdown-itemFor example of menu headers
Include a header to label areas of activities into any dropdown menu.
<div class="dropdown-menu">
  <h6 class="dropdown-header">Dropdown header</h6>
  <a class="dropdown-item" href="#">Action</a>
  <a class="dropdown-item" href="#">Another action</a>
</div>
extra solutions
An additional brand-new thing for this particular edition is the possibility to fit an inline forms in your
.navbar.form-inline<span>.navbar-textConclusions
As soon as it comes to the header items in the most recent Bootstrap 4 edition this is being actually taken care of with the integrated in Collapse plugin and a few navigation specified information classes-- some of them developed primarily for maintaining your product's identification and various other-- to get sure the actual page navigating structure will present best collapsing in a mobile style menu when a indicated viewport size is achieved.
Look at some youtube video short training relating to Bootstrap Header
Related topics:
Bootstrap Header: official documentation
Bootstrap Header article
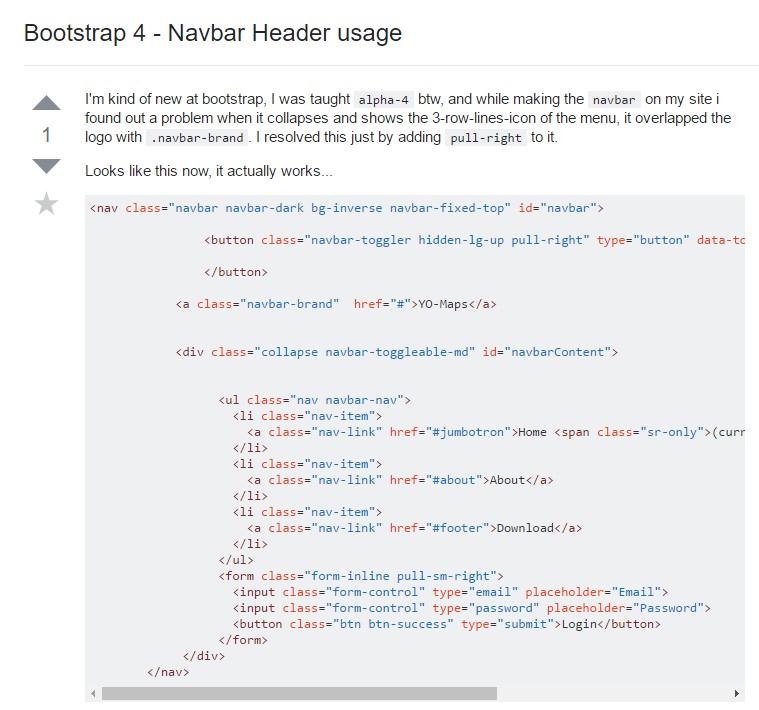
Bootstrap 4 - Navbar Header application